From One Floor Plan to 3D, Rendering, and Edits
Create a starting 3D model from a floor plan, bring it into SketchUp, render your view, and refine selected areas with Redraw.
On this page
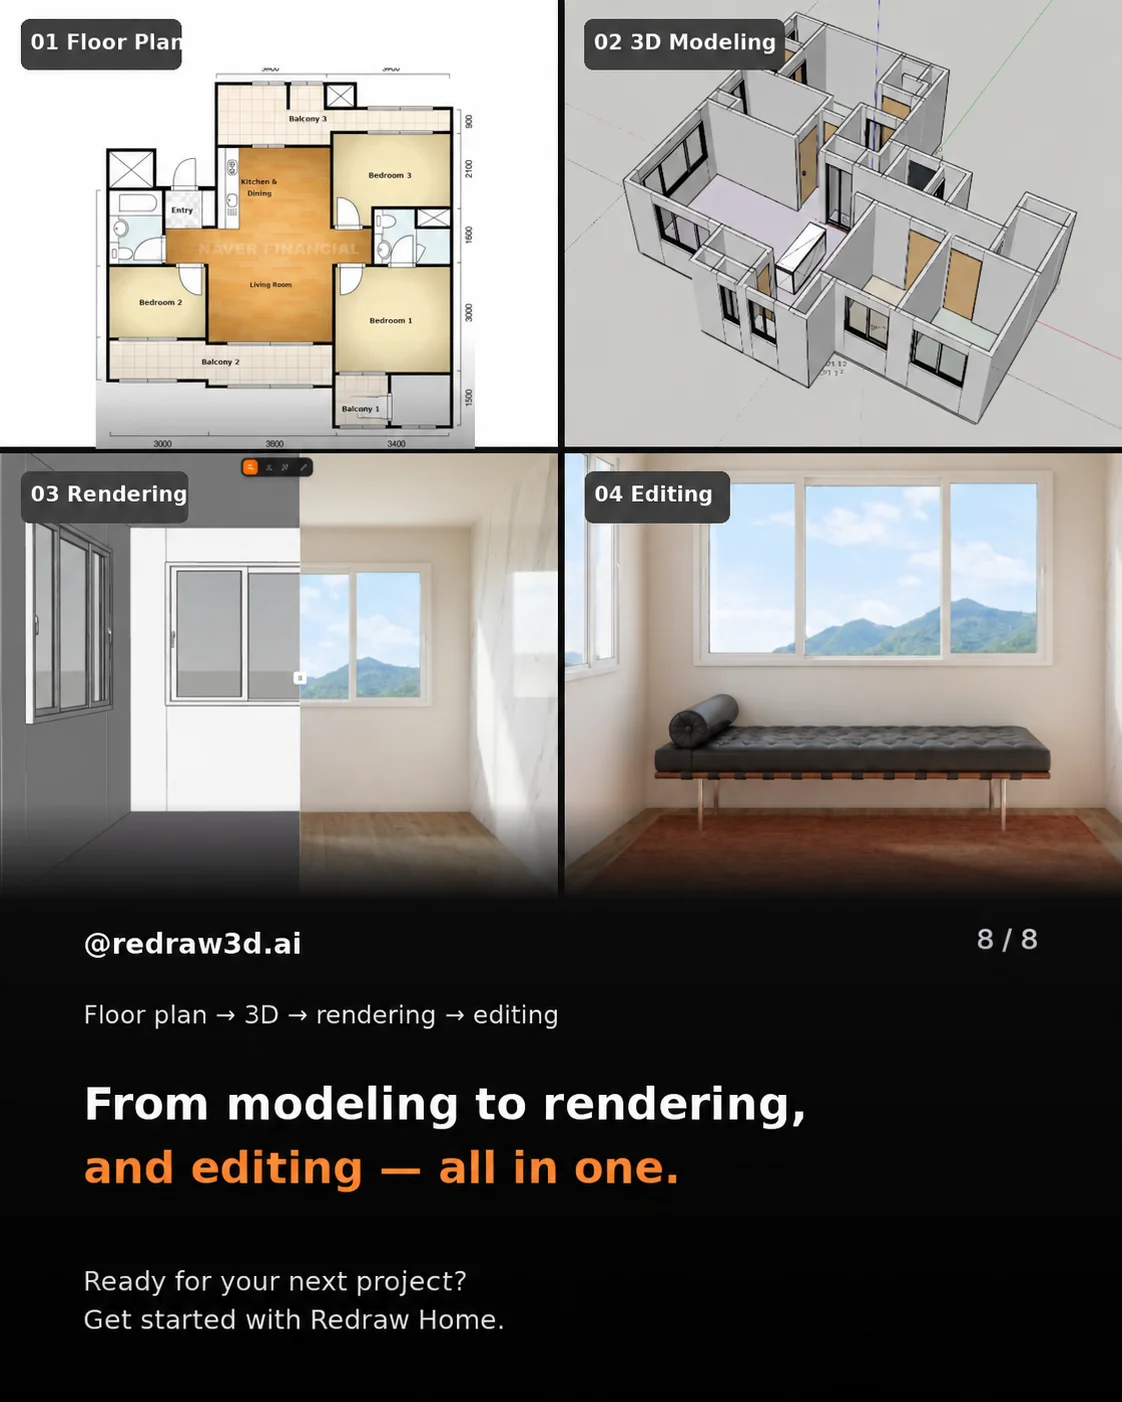
Before you begin1. Turn your floor plan into a starting 3D model2. Bring the model into SketchUp3. Capture your view and create a render4. Brush an area to edit furniture and detailsQuick answers about the Redraw workflowWhat does Redraw do with a floor plan?Can I continue working in SketchUp?Can I render and edit the same room view?Four checks before you finishRedraw is an AI-assisted design tool that connects floor-plan-based 3D modeling, SketchUp workflows, rendering, and image editing. Use a floor plan image as your starting point, review the generated structure, and develop a room view through rendering and selective edits.
This guide follows the same four-step example as our original Korean article. The images have been adapted for this English guide; interface details and available options may vary by version.
- Upload a floor plan to create a starting 3D model
- Bring the saved model into SketchUp
- Capture your view and generate a render
- Brush an area to refine furniture and details
Before you begin
- A clear floor plan image with readable walls, openings, and dimensions
- The Redraw integration connected to your account, if you plan to work in SketchUp
- A clear furniture reference photo, if you want to add or replace a specific piece
New to the integration? Start with the SketchUp guide. You can upload your plan in Floor Plan to 3D.
1. Turn your floor plan into a starting 3D model
Upload your floor plan image. Redraw identifies information such as walls, dimensions, and openings to generate a starting 3D structure. This gives you a model to review instead of beginning with every wall from scratch.
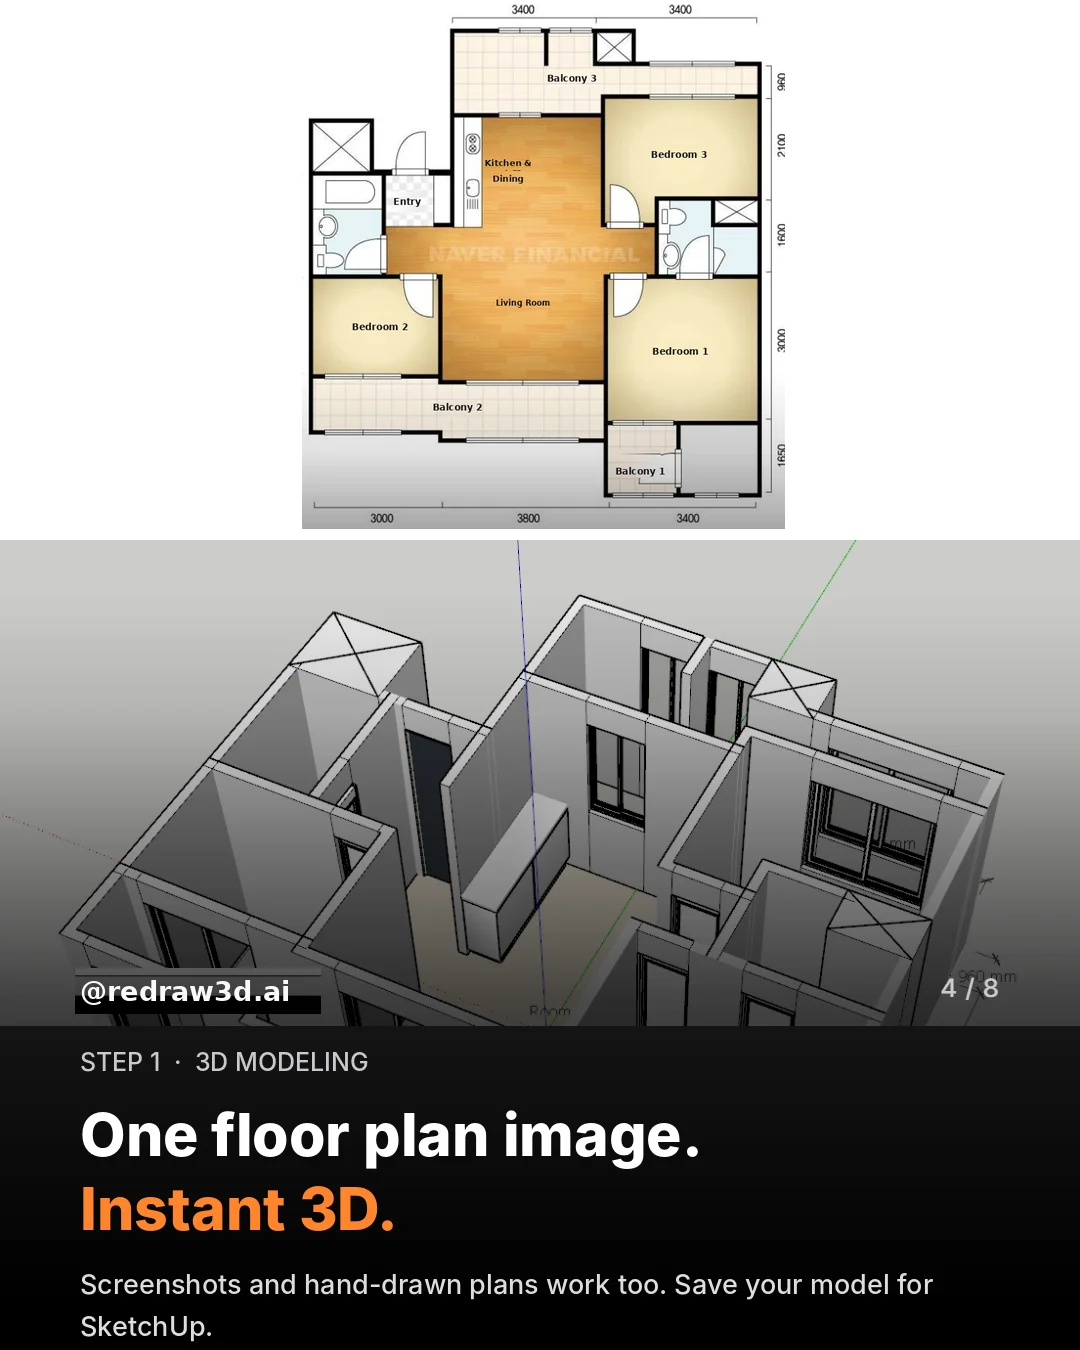
- Check that the plan area and dimension labels are clearly visible.
- Upload the image to Redraw and start generating the structure.
- Compare the result with the original plan, then save the model you have reviewed.
2. Bring the model into SketchUp
Once you have checked the basic structure, continue in SketchUp. Choose a saved result in the Redraw integration and add it to the model you already have open, reducing the need to download and import files manually.
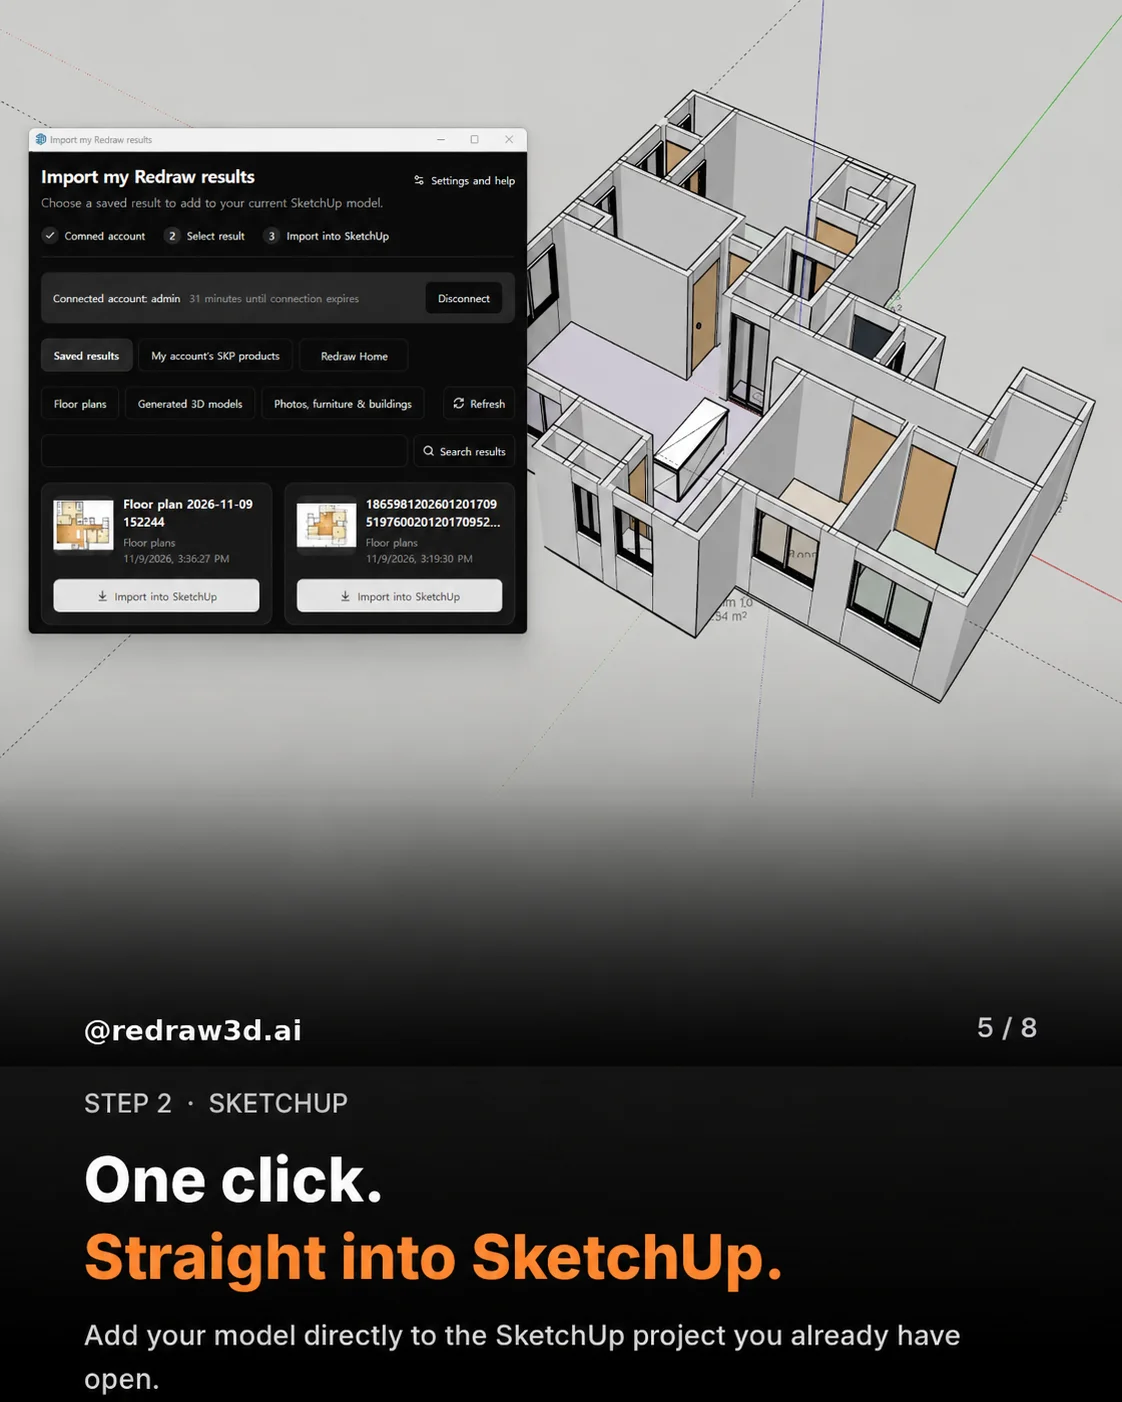
- Open the Redraw integration in SketchUp and connect your account.
- Choose the model from your saved results.
- Import it into the current SketchUp model and check its scale and placement.
- Refine the model and set up the camera view you want to render.
3. Capture your view and create a render
Set up the scene in SketchUp, then capture that view and upload it to Redraw image rendering. Use the original composition as your starting point and describe the lighting, materials, and atmosphere you want to explore.
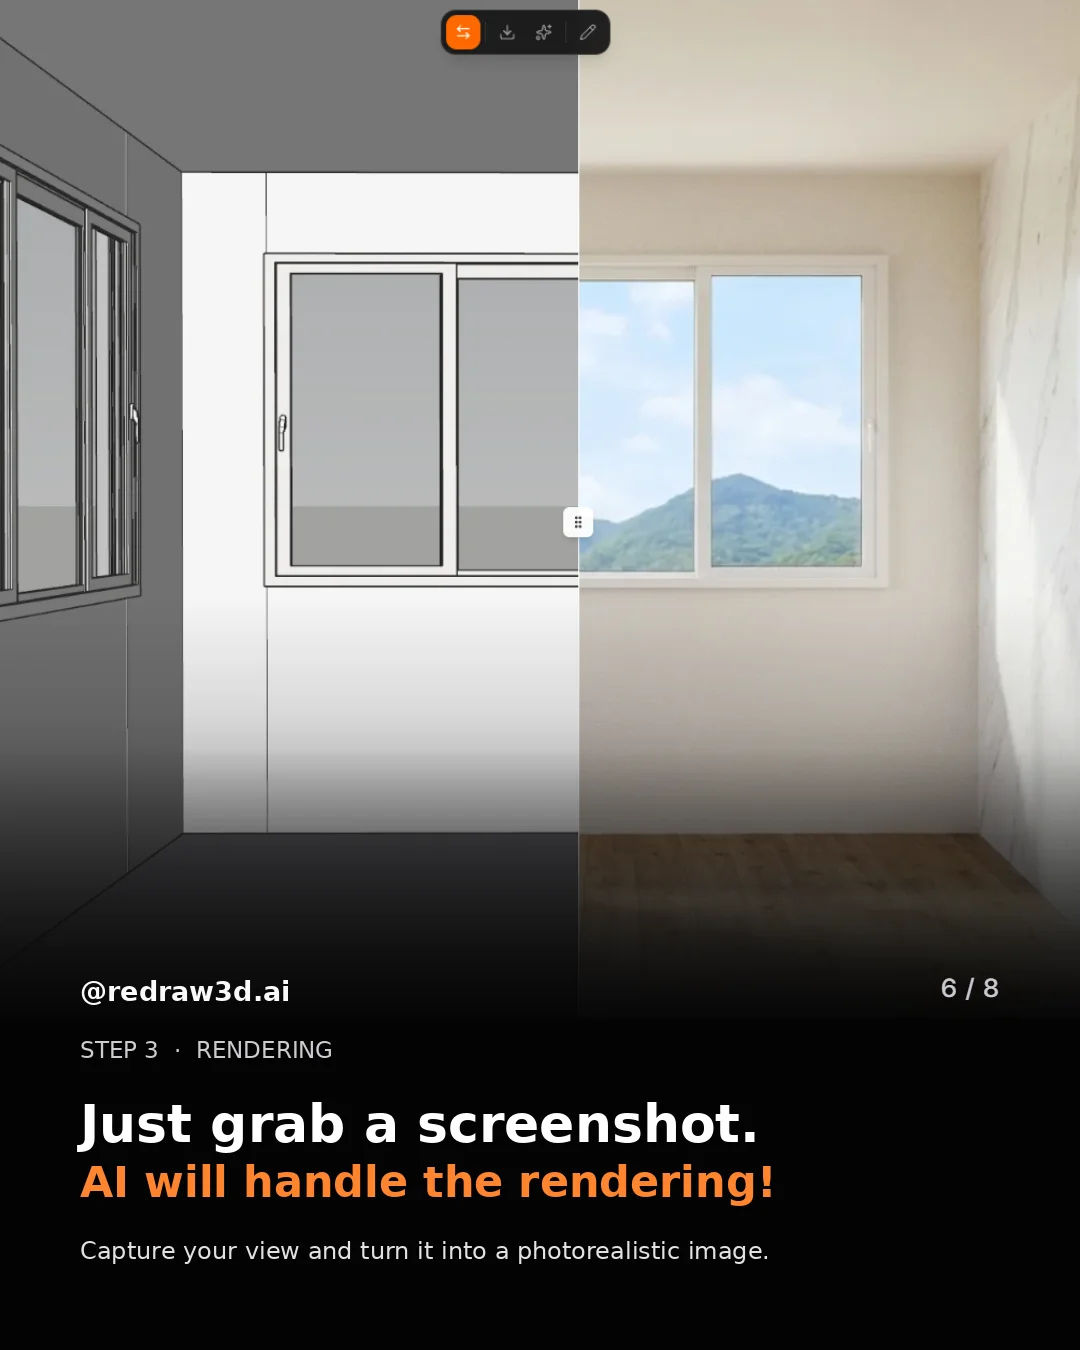
- Choose the space and camera composition you want to show.
- Capture the view and upload it for image rendering.
- Describe the time of day, lighting, and material finish.
- Compare the render with the source to check that the structure and composition still match your intent.
If you are unsure how to phrase your request, adapt the example below to your space and design goals.
Create a natural interior render while preserving the original camera composition and room proportions. Keep the walls and windows in their current positions. Use soft daylight through the windows, light-colored walls, and a calm wood floor with realistic texture.
4. Brush an area to edit furniture and details
When you want to change part of the render, open it in image editing. Brush the area where the change should happen, add a furniture reference if needed, and describe the placement and appearance you want.
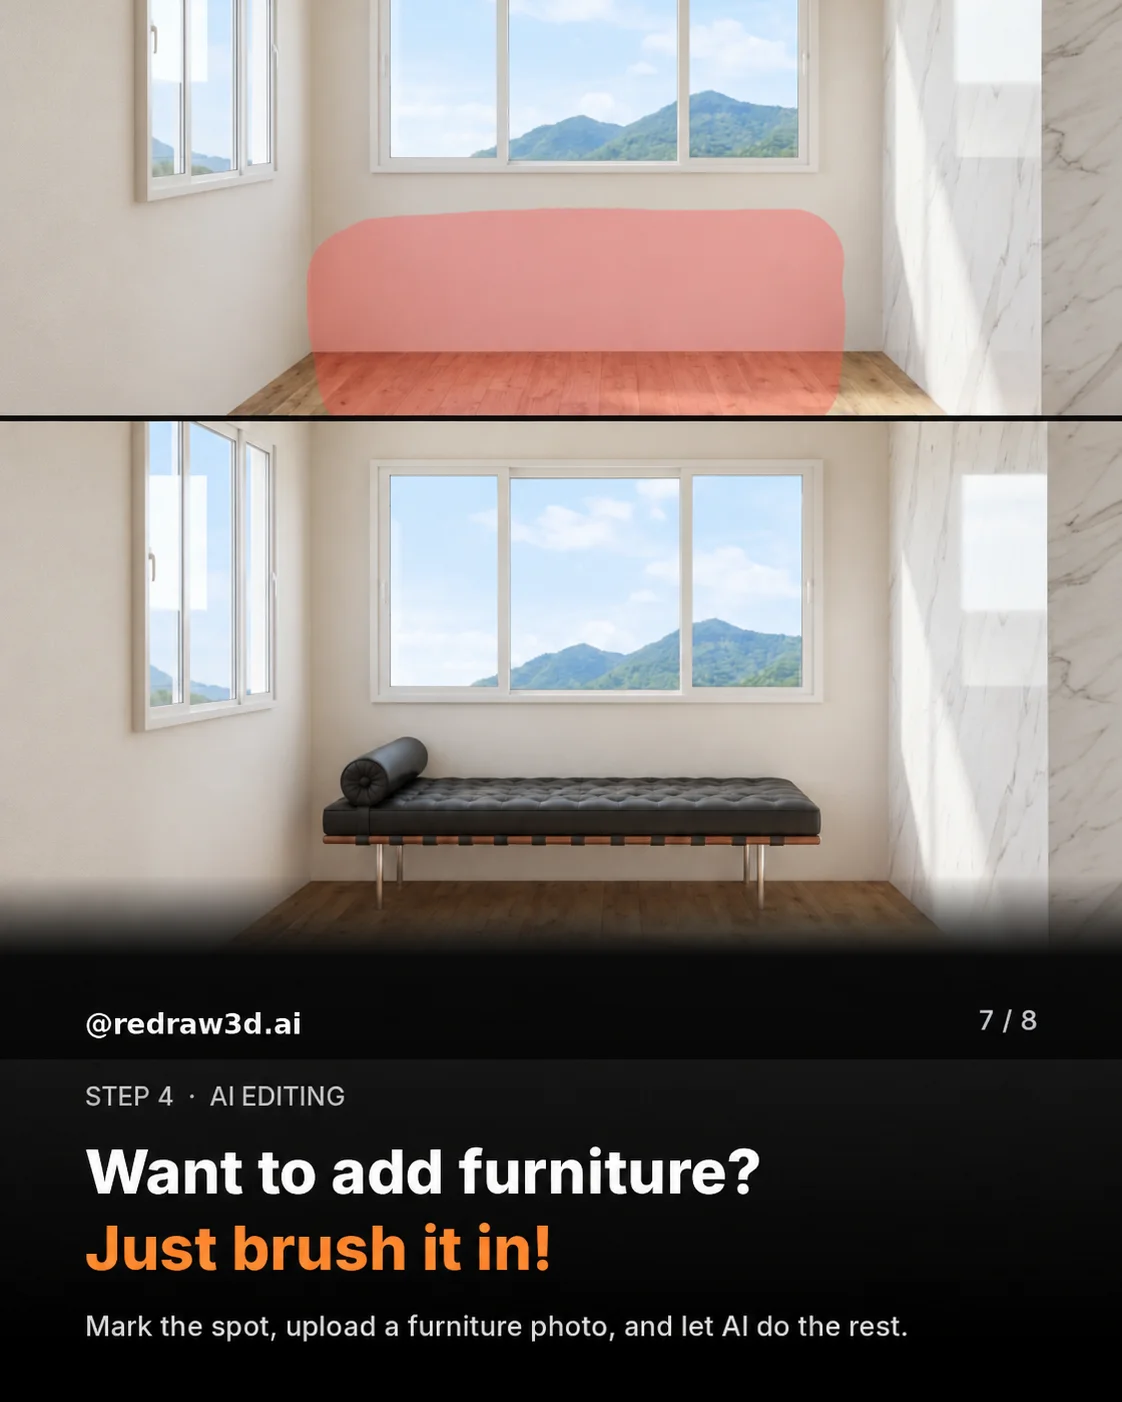
- Open the image in Redraw image editing.
- Brush the area where you want to add or change furniture.
- Attach a reference photo if useful, then describe the change.
- Check the furniture scale, placement, and any changes to the surrounding room.
Place the bench from the reference photo in the selected area. Match its size, perspective, and shadow so it sits naturally on the floor. Preserve the surrounding walls, windows, floor material, and camera composition.
Quick answers about the Redraw workflow
What does Redraw do with a floor plan?
Redraw uses a floor plan image to generate a starting 3D structure, including information about walls, dimensions, doors, and windows. Review the generated structure against the source plan before continuing your project.
Can I continue working in SketchUp?
Yes. Connect your Redraw account in the SketchUp integration, choose a saved result, and import it into the SketchUp model you have open. Check its scale and placement after importing.
Can I render and edit the same room view?
Yes. Capture your SketchUp view for image rendering, then use image editing to brush an area and request a change. Add a furniture reference if needed, and review both the edited area and the surrounding room.
Four checks before you finish
- Do the main dimensions and wall, door, and window positions match the floor plan?
- Is the imported SketchUp model at the right scale and location?
- Has rendering introduced an unintended change to the structure or camera composition?
- Does the edited furniture look natural in size, position, and relation to the surrounding space?
Use the floor plan to establish the structure, SketchUp to develop the view, and rendering and selective editing to explore a finished direction. Starting with a single room is a practical way to learn the full workflow.
Start with your floor plan →
Read the SketchUp integration guide →
Based on the step-by-step walkthrough on Redraw’s official Instagram. This article provides example requests and review tips; results depend on the source image and the task.